[Teach & Play] is a feature that allows you to save the movements of the robotic arm or the status of the modules combined with the robotic arm in a desired sequence. It enables the robotic arm to perform the desired movements sequentially, creating specific motions.
🎮[Teach & Play] Using the [Control Pad]
When the target coordinates (Coordinate 1, Coordinate 2, Coordinate 3) are set, it is possible to manually add coordinates, but in that case, it’s impossible to check if the robotic arm can move from (Coordinate 1) ➡️ (Coordinate 2) ➡️ (Coordinate 3). If you are unsure about the reachable range of the robotic arm or the concept of coordinates, it is recommended to use the [Teach & Play] feature while observing the robotic arm's movements via the [Control] pad.
When the target coordinates (Coordinate 1, Coordinate 2, Coordinate 3) are set, it is possible to manually add coordinates, but in that case, it’s impossible to check if the robotic arm can move from (Coordinate 1) ➡️ (Coordinate 2) ➡️ (Coordinate 3). If you are unsure about the reachable range of the robotic arm or the concept of coordinates, it is recommended to use the [Teach & Play] feature while observing the robotic arm's movements via the [Control] pad.
Let's explore how to create the robotic arm’s movements in the sequence of three coordinates below using [Teach & Play]:
Coordinate 1: (X=-250, Y=180, Z=0)
Coordinate 2: (X=250, Y=180, Z=0)
Coordinate 3: Home (X=0, Y=180, Z=0)
In [Move to], input the position of Coordinate 1 (X=-250, Y=180, Z=0) and click the [Move Now] button.
In [Status], confirm that the robotic arm has moved to the desired position, and then click the [Save Current Point] button in [Teach & Play]. (Ensure that the desired coordinate is correctly added to the current coordinate list.)
After clicking the [Save Current Point] button, the robotic arm will operate in Arc mode, which is the default mode for movement.
There are two movement modes for the robotic arm: 1) Arc Mode and 2) Linear Mode.
In [Move to], input the position of Coordinate 2 (X=250, Y=180, Z=0) and click the [Move Now] button.
In [Status], confirm that the robotic arm has moved to the desired position, and then click the [Save Current Point] button in [Teach & Play]. (Ensure that the desired coordinate is correctly added to the current coordinate list.)
In [Move to], input the position of Coordinate 2 (X=0, Y=180, Z=0) and click the [Move Now] button.
In [Status], confirm that the robotic arm has moved to the desired position, and then click the [Save Current Point] button in [Teach & Play]. (Ensure that the desired coordinate is correctly added to the current coordinate list.)
Checking the [Teach & Play] Results
Once all the desired coordinates are added, click the [Play] button located at the bottom right of [Teach & Play] to observe the robotic arm’s movements.
🤖 No Reachable Error Example
If you encounter a "No Reachable" error when clicking the [Play] button in [Teach & Play], it means that the robotic arm cannot reach one of the coordinates. The two common situations that cause this error are:
Coordinate 2 is initially an unreachable coordinate for the robotic arm.
The path from Coordinate 1 to Coordinate 2 contains an unreachable position.
Example of "No Reachable" error:
(Coordinate 1) X:0, Y:180, Z:0
(Coordinate 2) X:0, Y:180, Z:150
This error occurs because the robotic arm cannot move to Coordinate 2 due to its position being unreachable.
Result Video
The process of adding coordinate information to [Teach & Play] and verifying the results can be viewed in the video below.
🎮 Motor [ON/OFF] Function in [Teach & Play]
This method does not move the robotic arm to the exact position (X, Y, Z coordinates) to store the coordinates. Instead, the motor is turned off, and the robotic arm is manually moved to the desired position to save the coordinates.
모터In the motor OFF (turned off) state, even if the coordinates are added to [Teach & Play], the [Play] button may cause a "No Reachable" error.
🦾Understanding Motor ON/OFF State
The robotic arm’s movement is controlled by the motors inside the arm. When the robotic arm is connected to power, the motors are turned on, and external forces cannot move the arm.
Motor ON
Motor On
Motor OFF
Motor OFF
[Teach & Play] - How to Add Coordinates with the Motor Off
Set the motor to off and move the robotic arm to the desired position.
While holding the robotic arm in place, click the [Save Current Point] button in [Teach & Play].
💡You don't need to press the motor on button separately; the motor will automatically turn on when you click the [Save Current Point] button.
Result Video
🎮 Manually Setting [Teach & Play] Settings
1. Changing the Robotic Arm Movement Mode
In [Teach & Play], you can save the movement of coordinates by clicking the [Save Current Point] button, or you can manually add coordinates by clicking the [➕] button below, or add module actions as part of the robotic arm's movements.
When you click the [➕] button, a popup will appear. You will see that the default movement mode is set to Arc. If you want to change the movement of an already added coordinate to Linear mode, click the Edit icon of the desired coordinate and select Linear.
2. Adding Module States (Adding End Effects)
[End Effect] is an option that allows you to change the state of the currently attached module (Suction or Soft-Gripper) on the robotic arm. The initial End Effect value for robotic arm movements is set to [None].
By clicking the [➕] button to add an item in [Teach & Play] and selecting the movement mode as [No movement], you can set the idle time and End Effect while the robotic arm is not moving.
You can select either the Suction module or the Soft-Gripper module for the End Effect.
The Soft-Gripper module has three states: 1) Idle, 2) Grip, and 3) Open. The Suction module has two states: 1) Off and 2) On.
Let's examine how each module behaves in its different states.
Soft Gripper
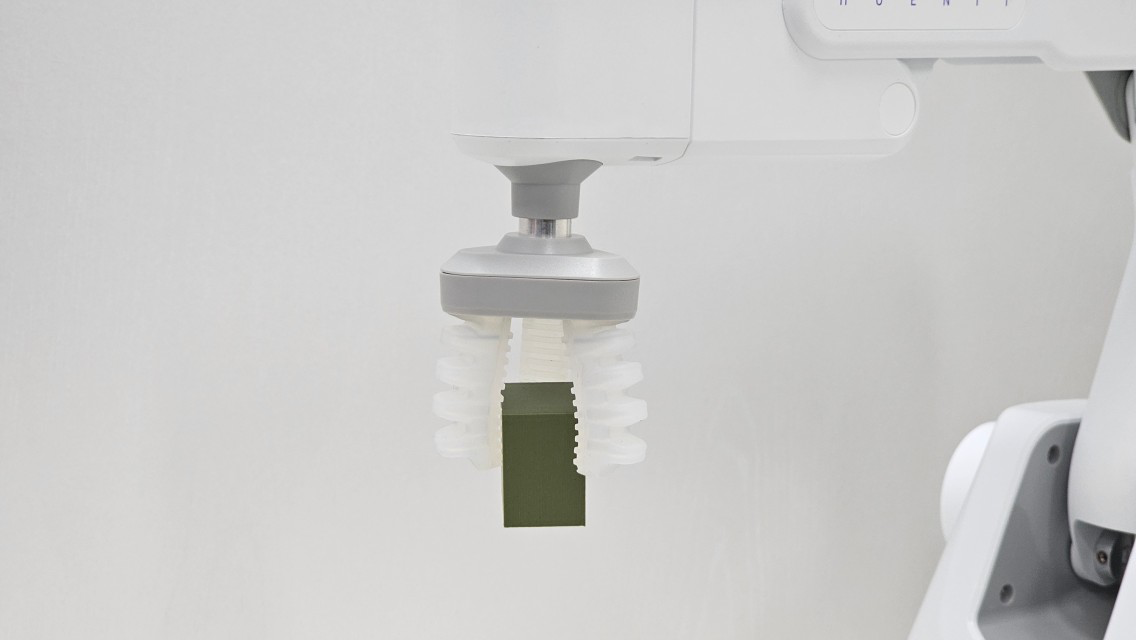
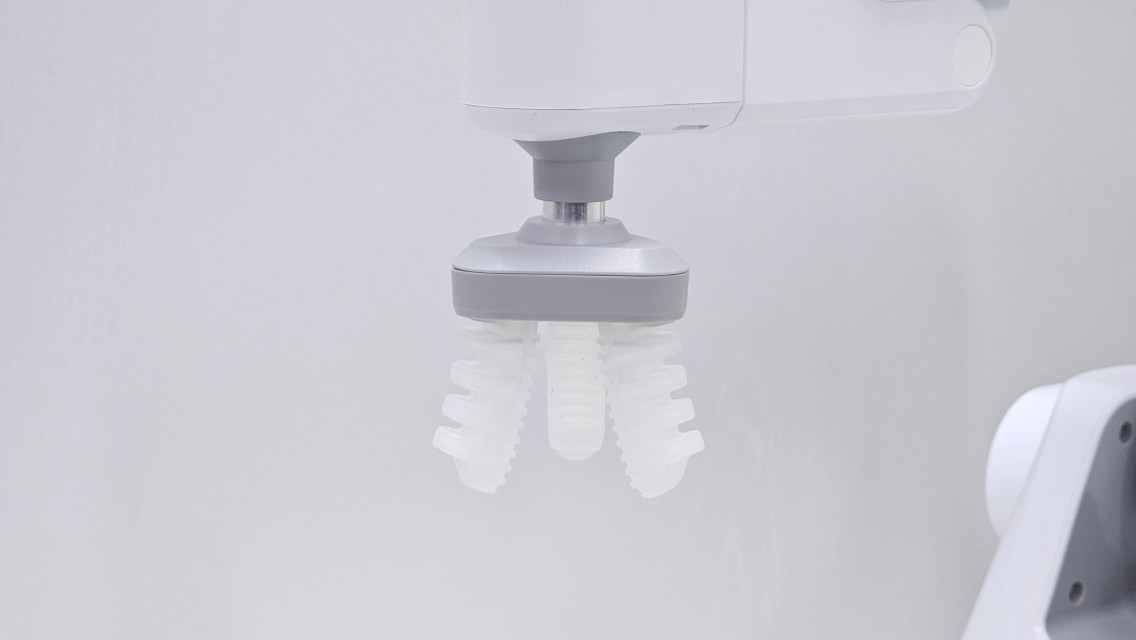
The Soft Gripper can be controlled in three states: Idle, Grip, and Open. The Soft Gripper is used for picking up irregularly shaped objects and is more suitable for lighter objects compared to the Suction module.
Soft Gripper Idle (Soft-gripper state: Idle)
Soft Gripper Idle (Soft-gripper state: Idle)
Soft Gripper Idle (Soft-gripper state: Grip)
Soft Gripper Idle (Soft-gripper state: Grip)
Soft Gripper Idle (Soft-gripper state: Open)
Soft Gripper Idle (Soft-gripper state: Open)
Suction
The Suction module can be controlled in two states: Off and On.
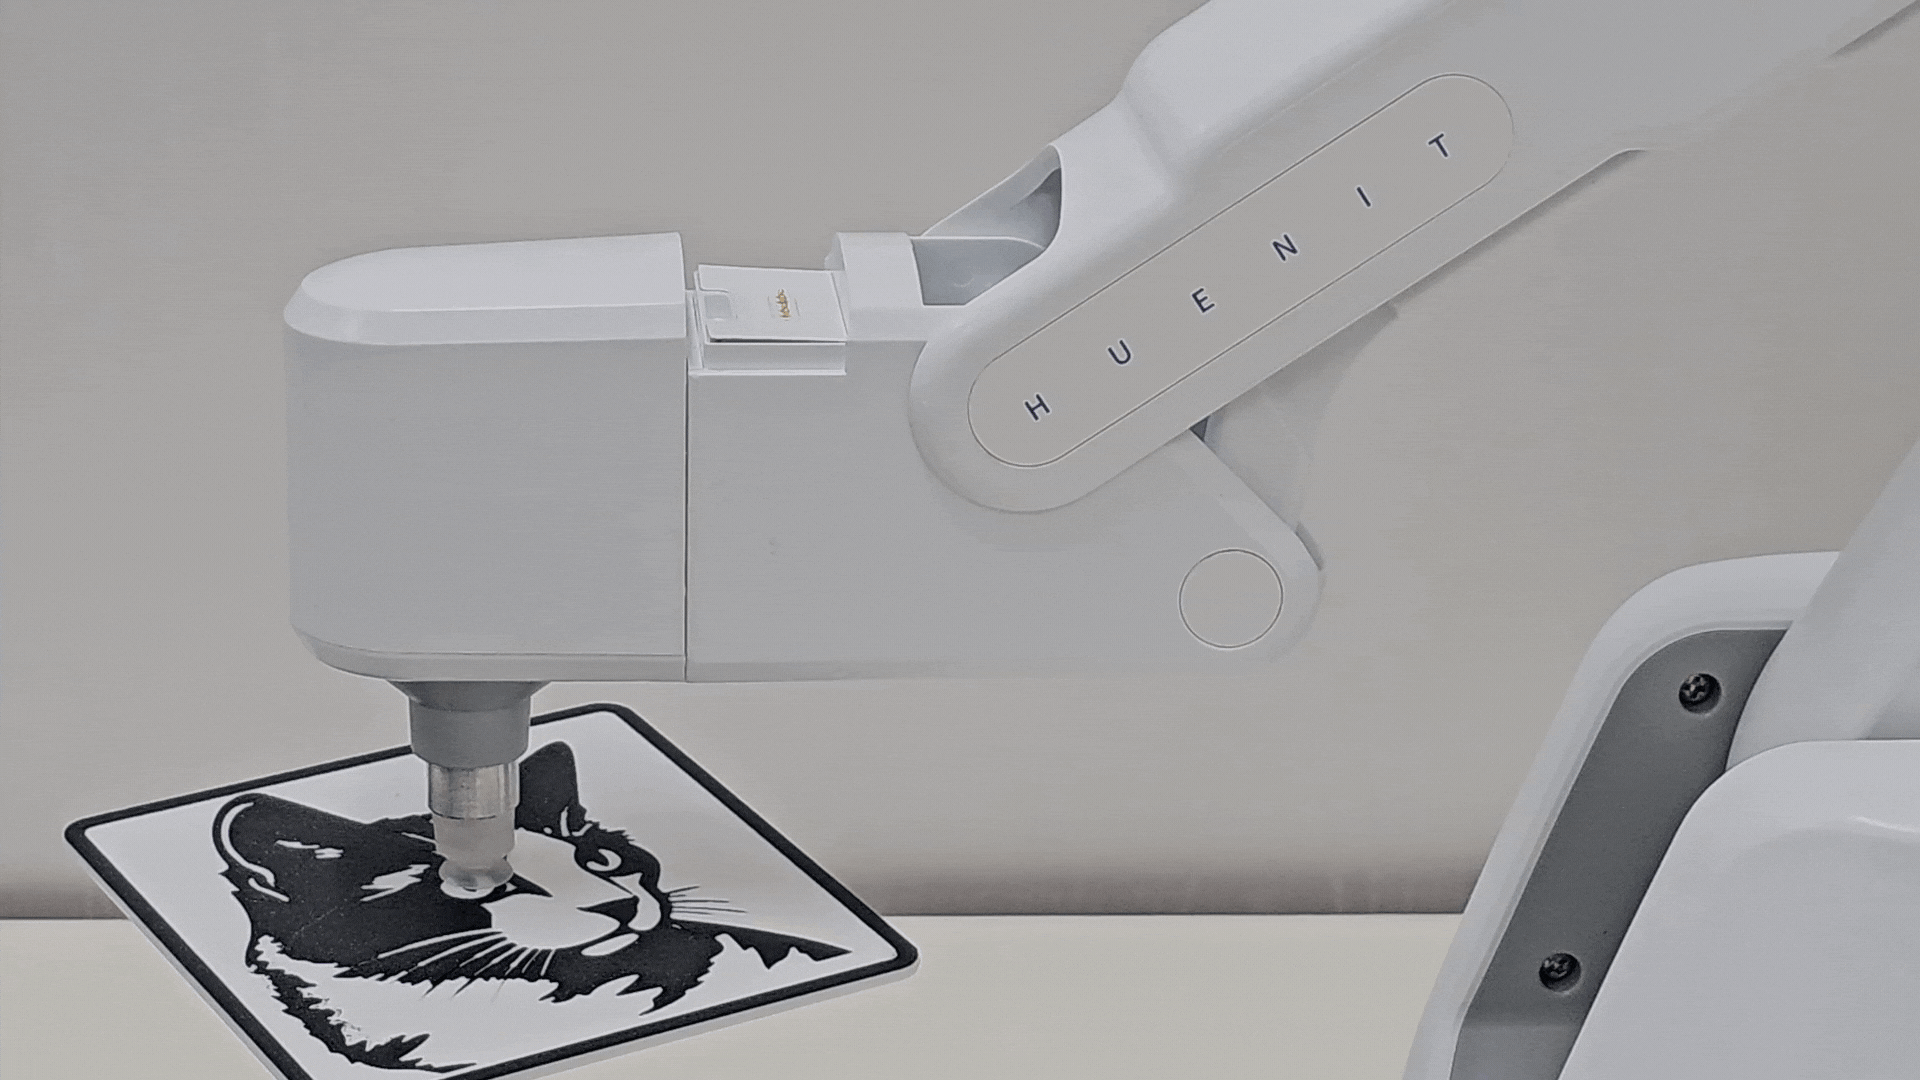
It is primarily used for picking up flat objects. It can securely transport objects weighing less than 500g. The Suction module comes with two different sizes of cups, which can be swapped depending on the surface area of the object to be moved.
Suction On
Suction On
Suction Off
Suction Off
Suction Module - Cup Sizes
: Large cup size (Mainly used for picking up objects with a larger surface area)
: Small cup size (Mainly used for picking up objects with a smaller surface area)
Suction Module - Cup Sizes
📌How to Use Macros
You can manage the desired movements of the robotic arm created in [Teach & Play] as a single macro project.
1. Save the Project to the Macro
: Under [Macro Name], enter a name that describes the current movement of the robotic arm.
: Click the [Save as Macro] button to confirm that the project has been added with the name you specified in the [Macro] section on the right.
2. Stored Macro Projects
When a macro with the name {Test} is saved, the following functions can be used:
▶️Play: The movements stored in this macro file will be executed.
Download: The macro file will be saved as a text file.
Edit: A macro editing popup will appear, allowing you to edit the macro.
Delete: The macro can be deleted.
By clicking the macro name (e.g., test), it can be reloaded into [Teach & Play] for editing.
Macro Project Management
If a macro with the same name is saved, it will replace the existing project with the new macro.
If the [+New Project] button is clicked while creating a project, the macro will not be saved and will be lost.
If a project within the macro is clicked while creating a project to load it into [Teach & Play], it will not be saved and will be deleted.
📌Robotic Arm Movement Mode: Arc (Arc) vs Linear (Linear)
Arc Mode
Arc mode is when the robotic arm moves in a circular path from (Coordinate 1) to (Coordinate 2).
Linear Mode
Linear mode is when the robotic arm moves in a straight line between the coordinates.
Since the robotic arm moves in a limited arc based on its center, arc mode results in fewer "No reachable" errors compared to linear mode. Therefore, the default movement of the robotic arm is always set to arc mode.
Since the robotic arm moves in a limited arc based on its center, arc mode results in fewer "No reachable" errors compared to linear mode. Therefore, the default movement of the robotic arm is always set to arc mode.
When operating in Arc mode:
When creating movements by clicking the [Save Current Point] button in [Teach & Play]
When moving the robotic arm using [Set Target Position] on the [Control] pad
Let's observe the difference in movement when using arc mode and linear mode with the following two coordinates.


 : Large cup size (Mainly used for picking up objects with a larger surface area)
 : Small cup size (Mainly used for picking up objects with a smaller surface area)
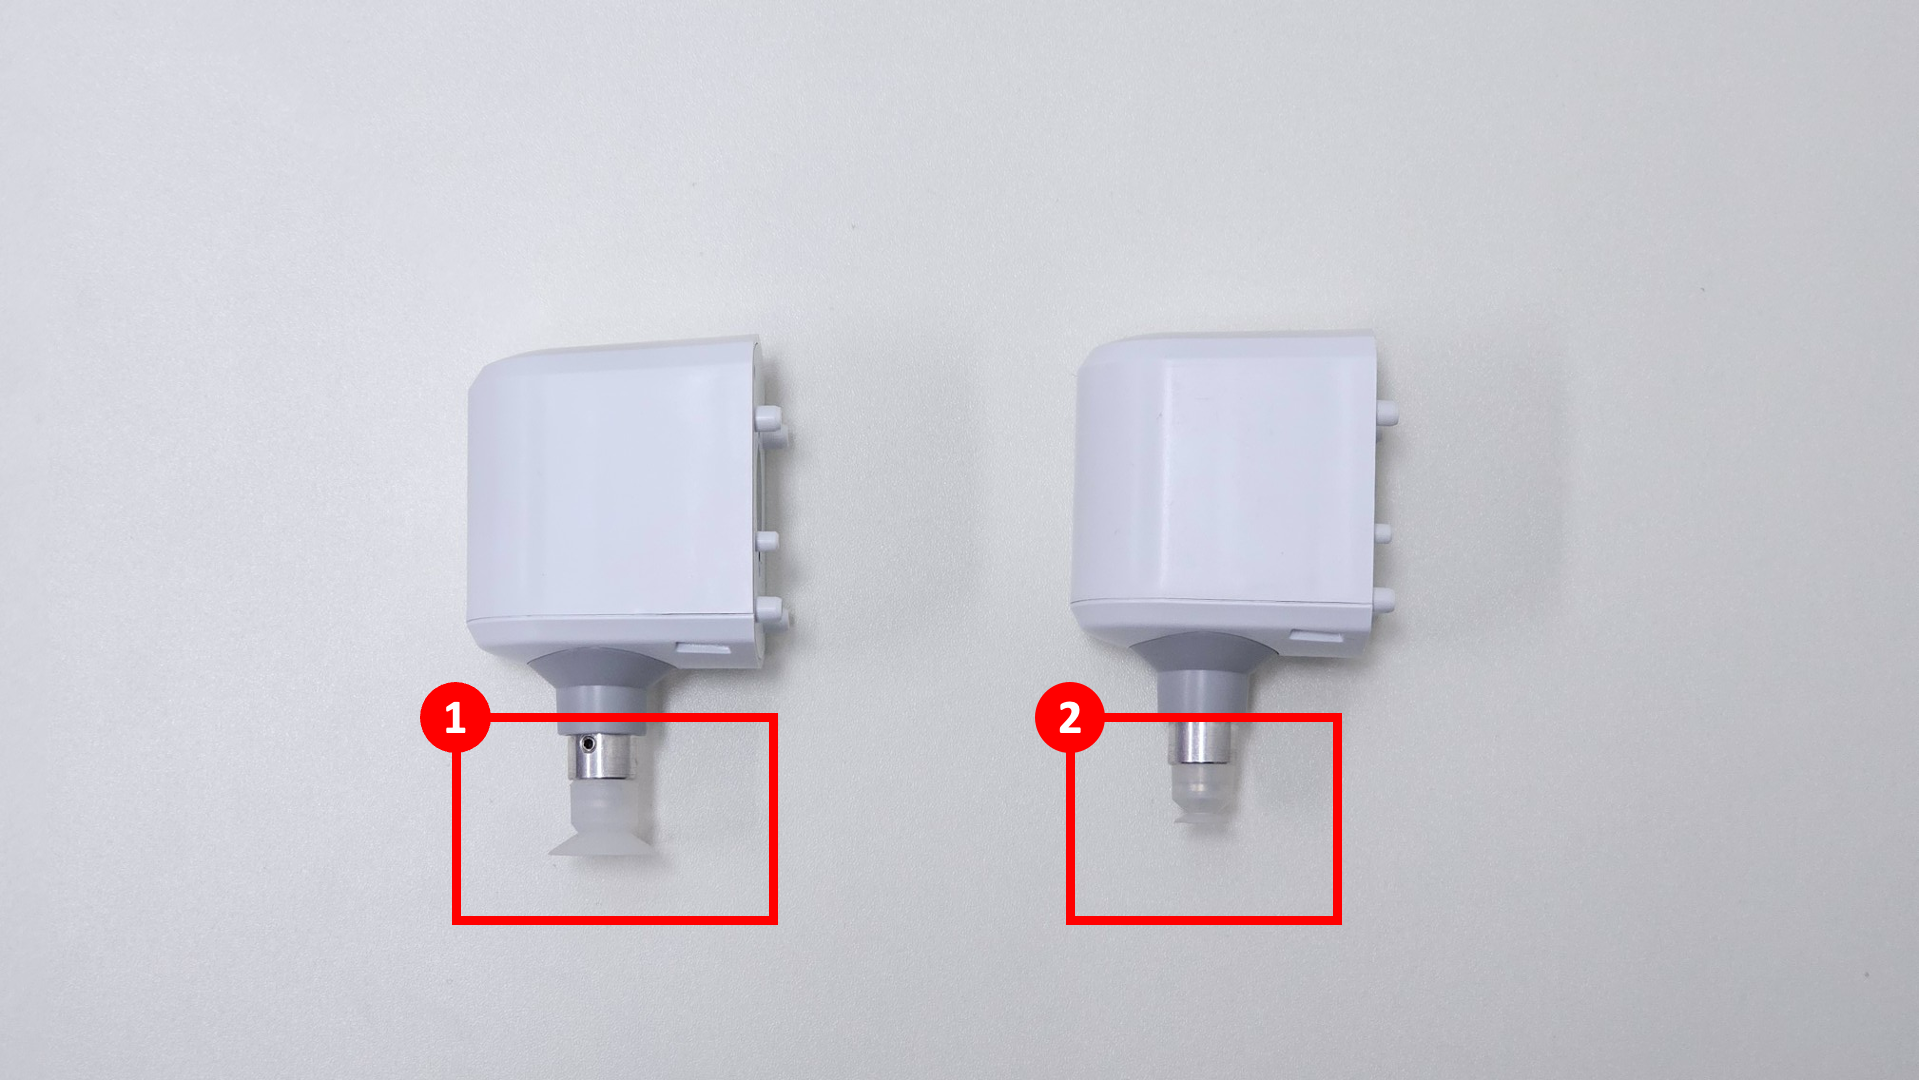
 : Under [Macro Name], enter a name that describes the current movement of the robotic arm.
 : Click the [Save as Macro] button to confirm that the project has been added with the name you specified in the [Macro] section on the right.

 Download: The macro file will be saved as a text file.
 Edit: A macro editing popup will appear, allowing you to edit the macro.
 Delete: The macro can be deleted.


