To control the HUENIT robotic arm in HUENIT LAB, it must first be connected to the software.
Steps to Connect the HUENIT Robotic Arm:
Connect the HUENIT robotic arm to a PC.
Plug the power cable into the DC IN port of the robotic arm.
Use a USB-C cable to connect the robotic arm to the PC.
Click the [Auto-Connect] button in HUENIT LAB to establish the connection.
If a connection error occurs, the robotic arm is not properly connected to the PC.

If a "Success" pop-up appears, the robotic arm has been successfully connected to the software.
While the robotic arm is auto-connecting, other buttons in the [Control] tab cannot be clicked.
[Auto-Connect] > Robot Connected (1) Robotic Arm Connected
(2) AI Camera Connected
🤖 Robot Motion Control
If a new control command is repeatedly sent while the robotic arm is still executing a previous command, an error may occur.
Therefore, always wait for the current movement to finish before sending a new command.
The robotic arm can be controlled from the [Control Pad] on the right side of the [Control] tab.
A total of 12 buttons (1 Home button and 11 direction buttons) are available for controlling the robotic arm.
The 11 direction buttons move the robotic arm by the distance set in [Width of movement].
The movement range unit is in millimeters (mm), and users can set predefined values (0.1 / 1 / 10) or specify a custom value.
Pressing the [Home] button moves the robotic arm to its default position:
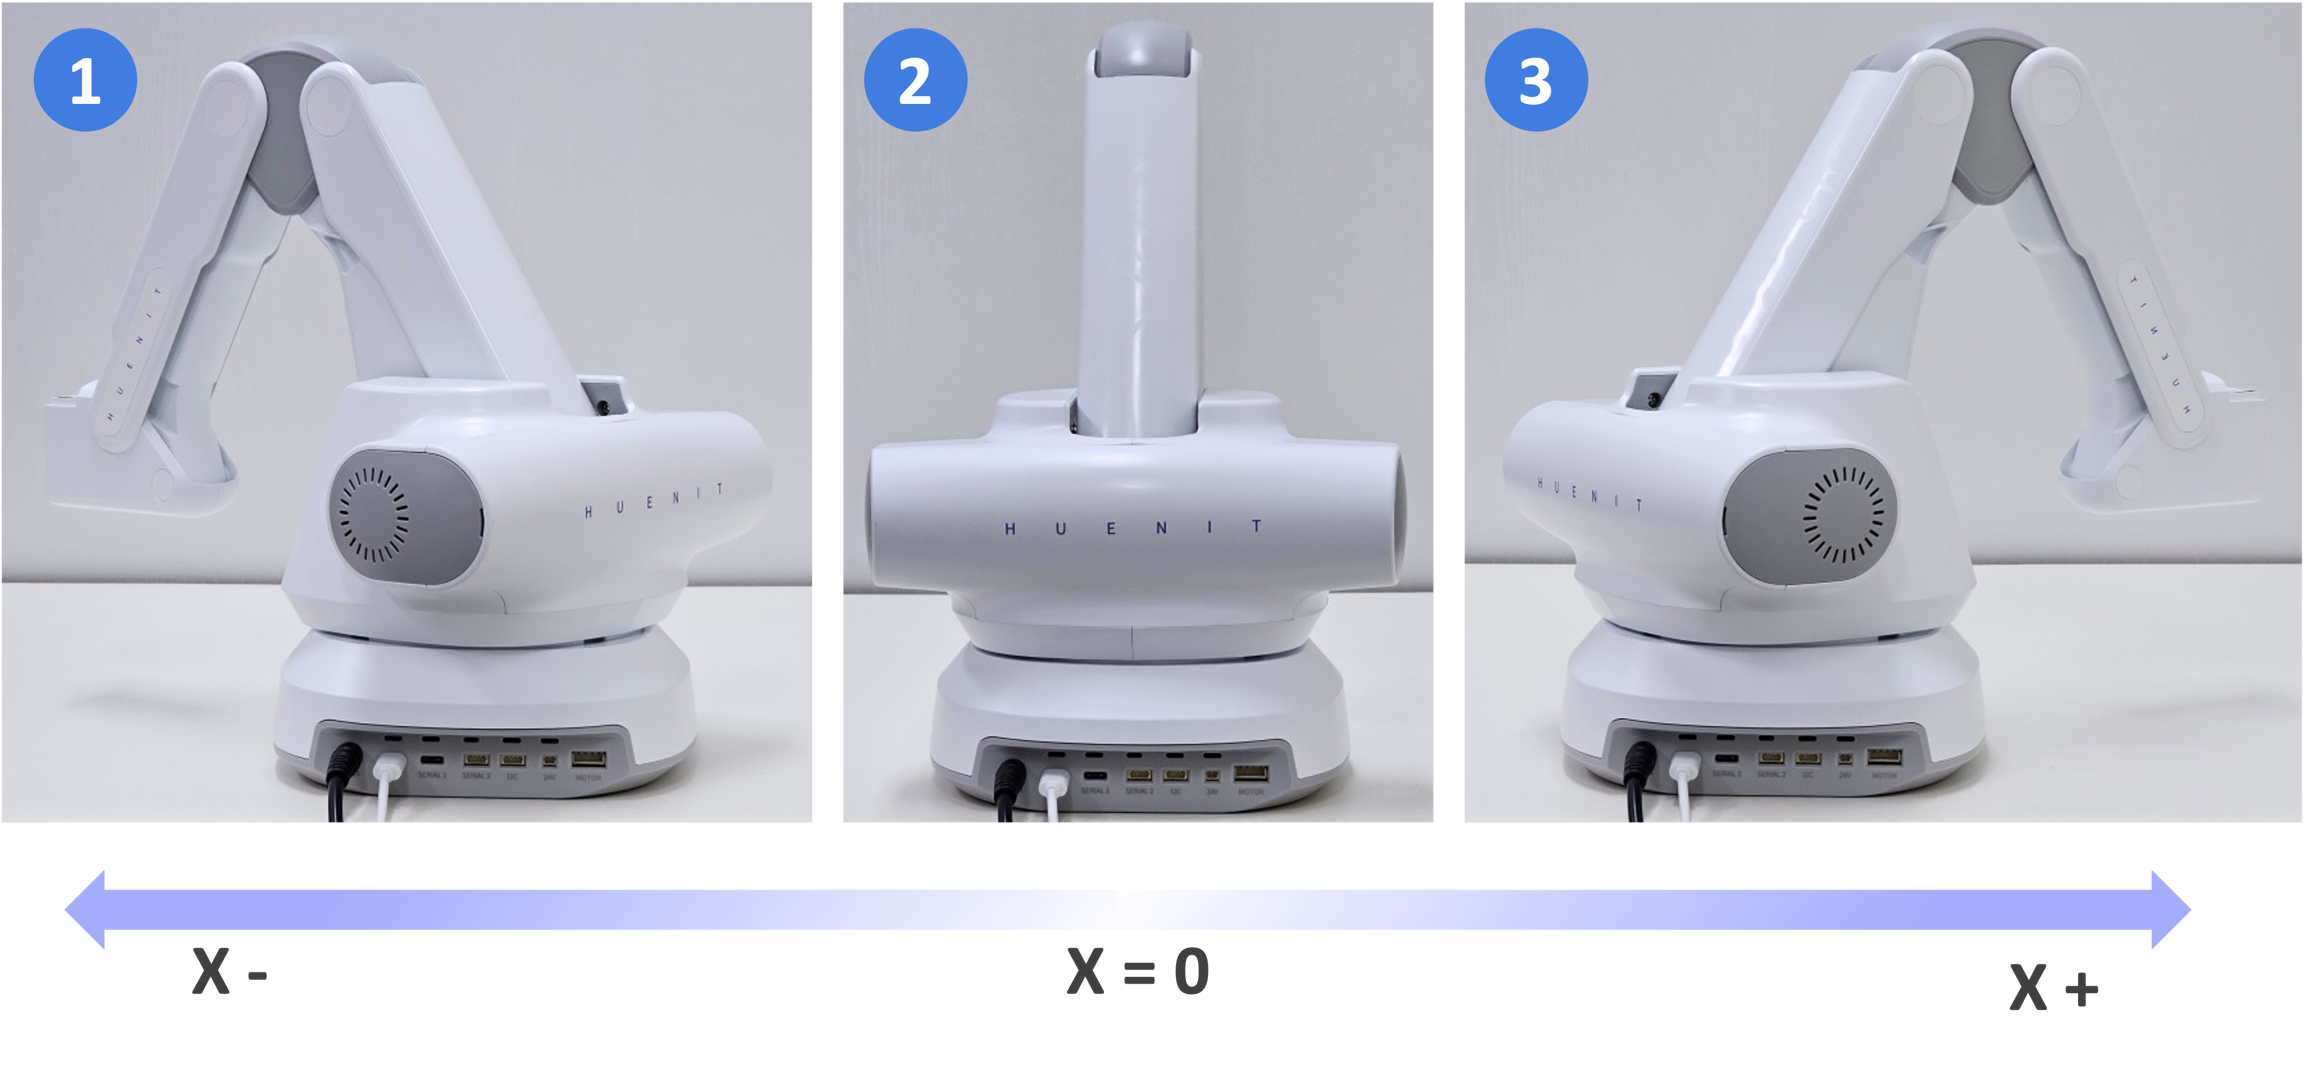
X-Axis Movement
When viewed from the back of the HUENIT robotic arm:
The movement range of the X-axis depends on the current Y and Z coordinates.
 : (X = -200, Y = 120, Z = 0)
 : Home Position(X = 0, Y = 180, Z = 0)
 : (X = 200, Y = 120, Z = 0)
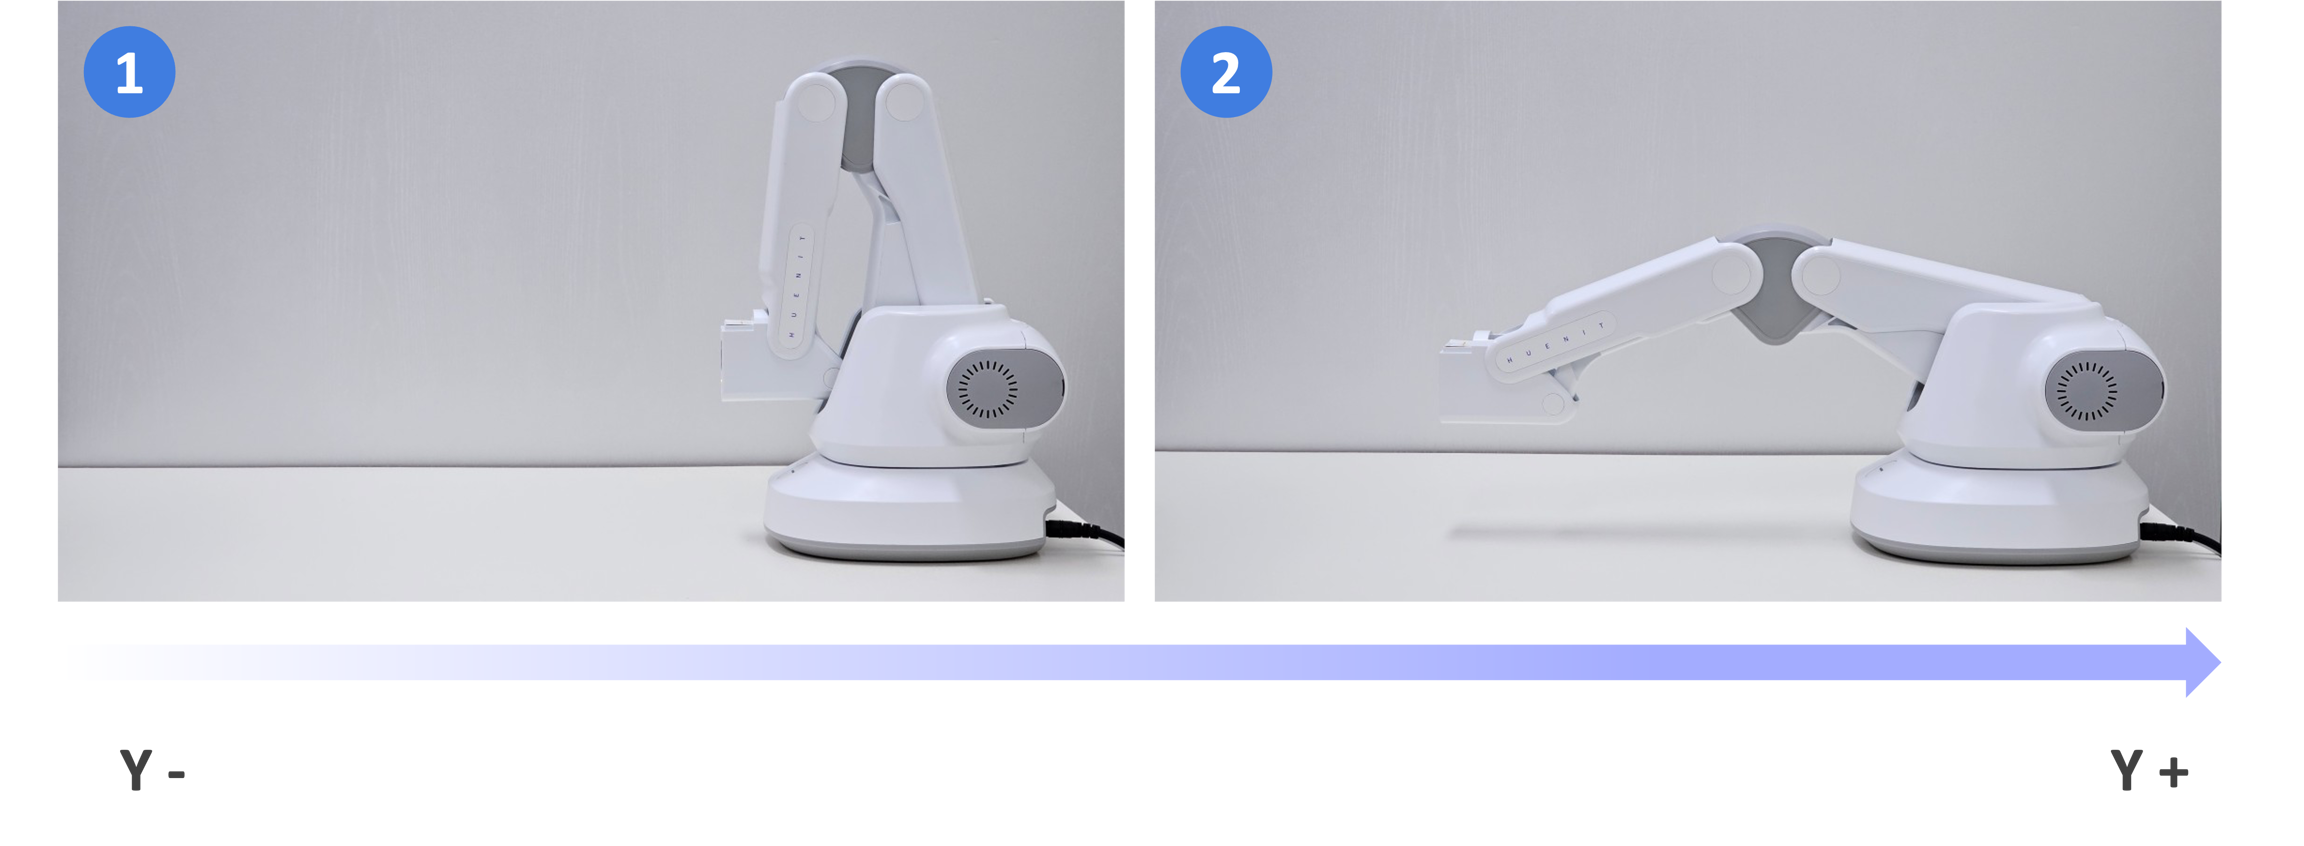
Y-Axis Movement
When viewed from the left side, keeping X = 0 fixed:
Y- (negative direction) and Y+ (positive direction) movement range changes based on X and Z coordinates.
: (X = 0, Y = 130, Z = 0)
: (X = 0, Y = 370, Z = 0)
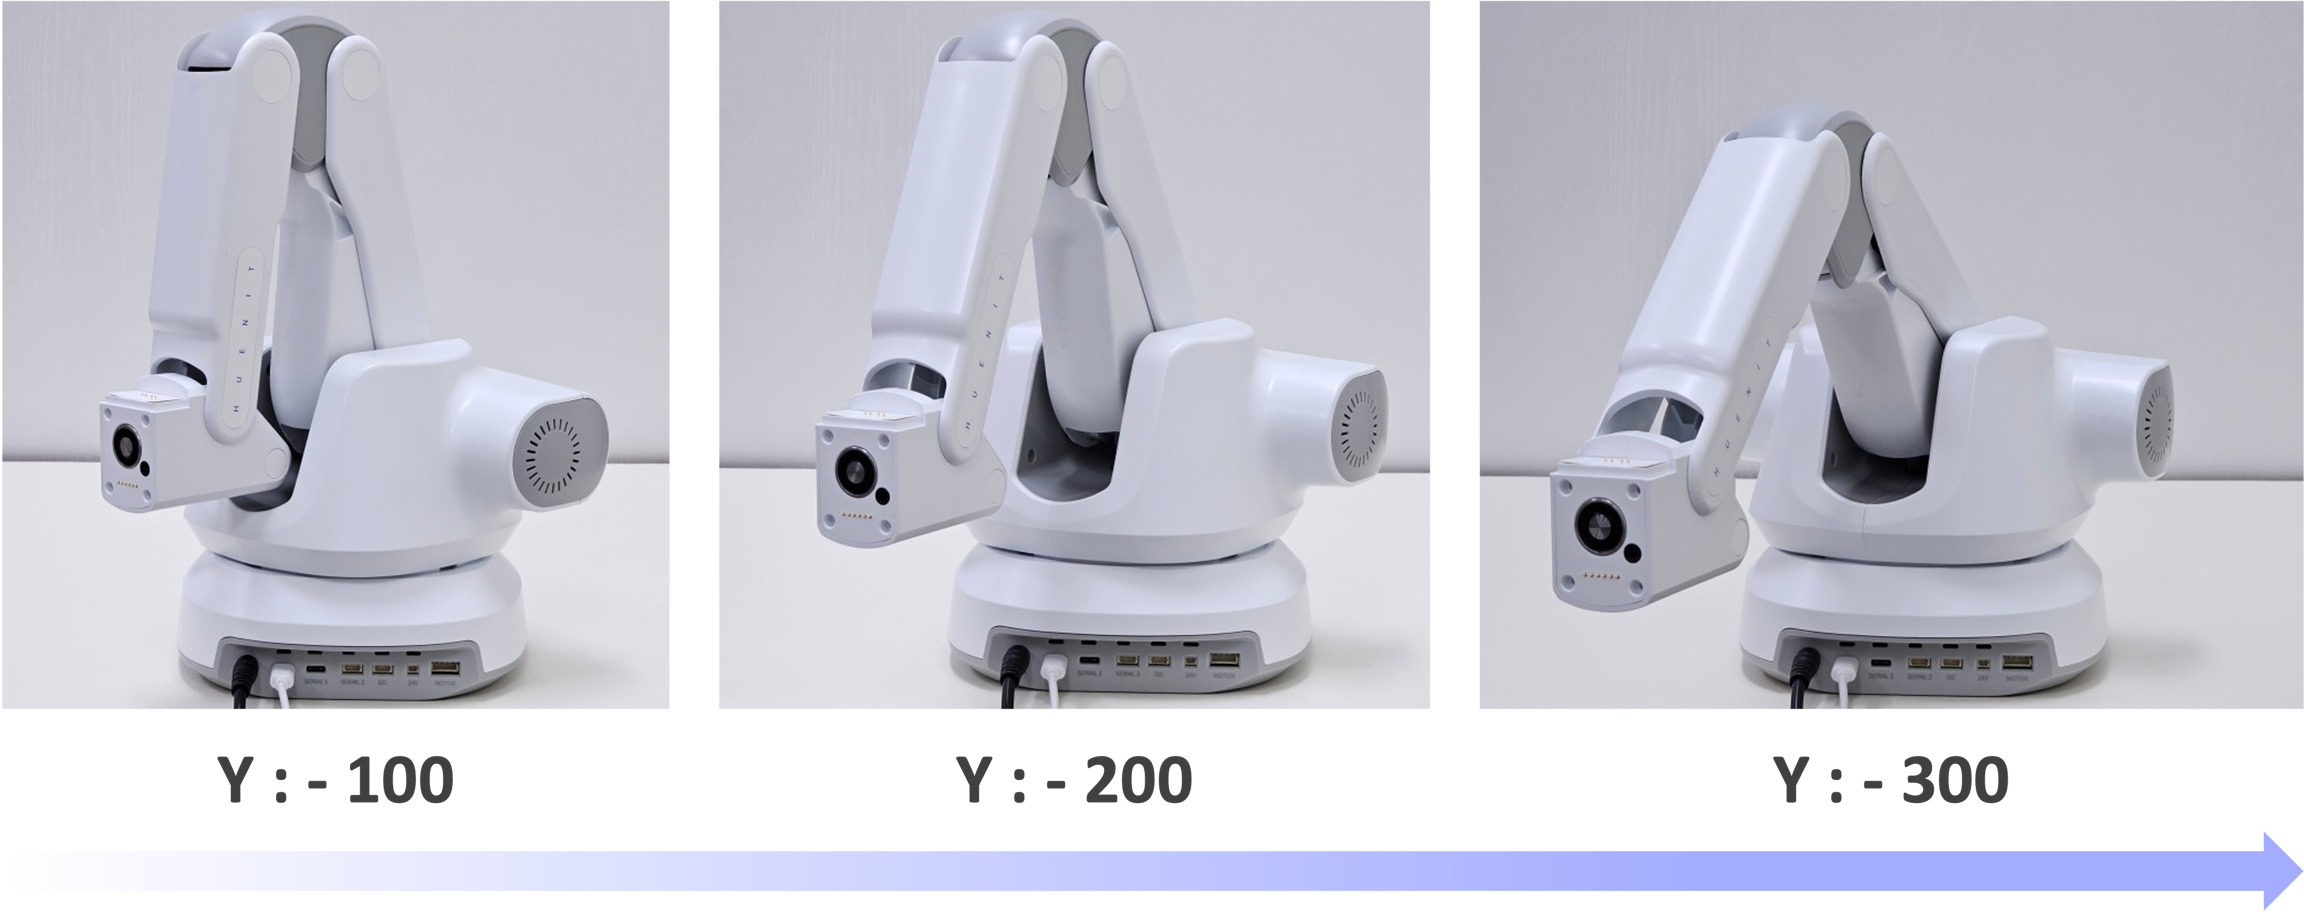
If X = -100, the Y-axis movement range can change depending on the Z coordinate.
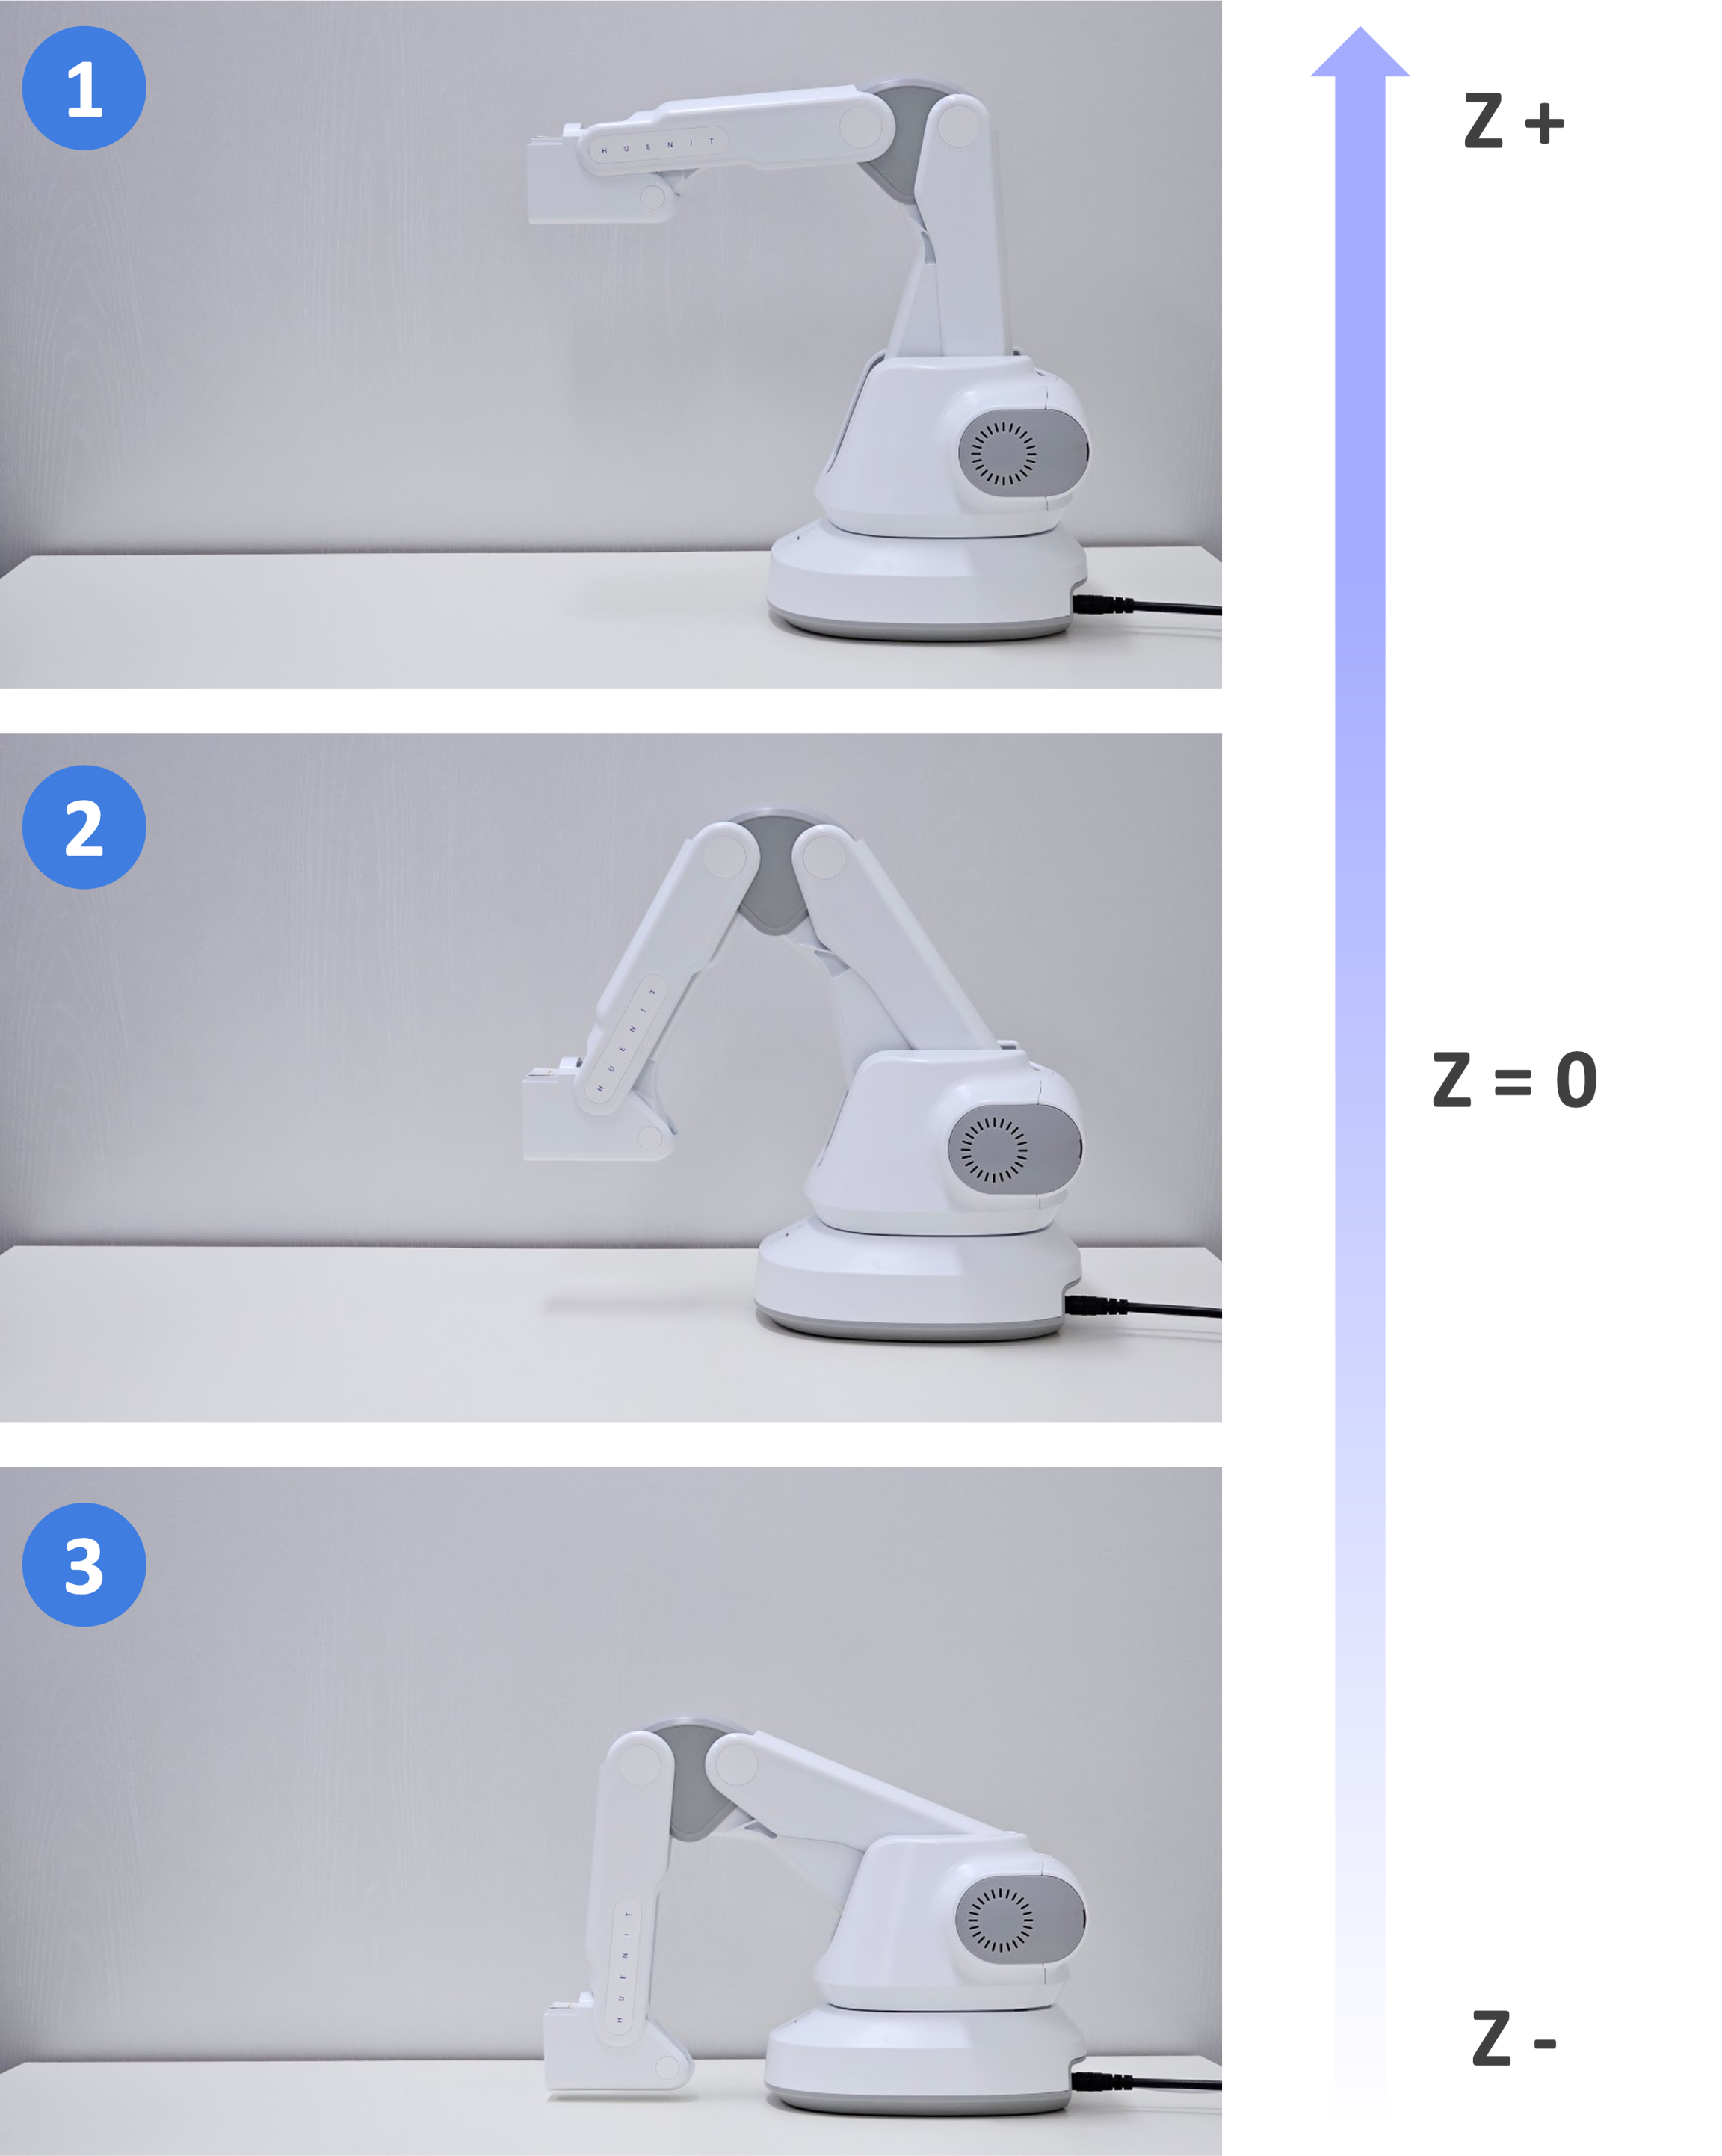
Z-Axis Movement
: (X = 0, Y = 235, Z = 145)
: (X = 0, Y = 235, Z = 0)
: (X = 0, Y = 235, Z = -85.8)
The Z-axis movement range depends on the current X and Y coordinates.
2) Speed Control
The default movement speed is set to 100, but can be adjusted using the slider (Range: 1 to 400).
When moving between Coordinate 1 (X = 250, Y = 150, Z = 0) and Coordinate 2 (X = -250, Y = 150, Z = 0), speed differences are observed:
[Speed: 10]
[Speed: 100]
[Speed: 300]
Users can manually input target X, Y, Z coordinates to move the robotic arm precisely.
Click [Move to Target] after entering the desired coordinates.
If the entered coordinates are out of the robotic arm's reachable range, a "No Reachable" error will occur.
🏡 Checking Current Robot Position
The [Status] section displays the current X, Y, Z coordinates of the robotic arm.
When using the control pad, movements are executed based on the set movement range.
After movement, the exact current position can be confirmed by checking the displayed coordinates in the Status section.
Last updated