1. How to Use [Robot Control]

0. HUENIT OS - Robot Control Menu

When entering the [Robot Control] menu from the HUENIT OS home screen, you will see the following four buttons:

  • Button Control

  • Stick Control

  • Teach & Play

  • Robot Settings

[Robot Control] Menu

1. Getting Ready

1-1 Required Materials

circle-exclamation

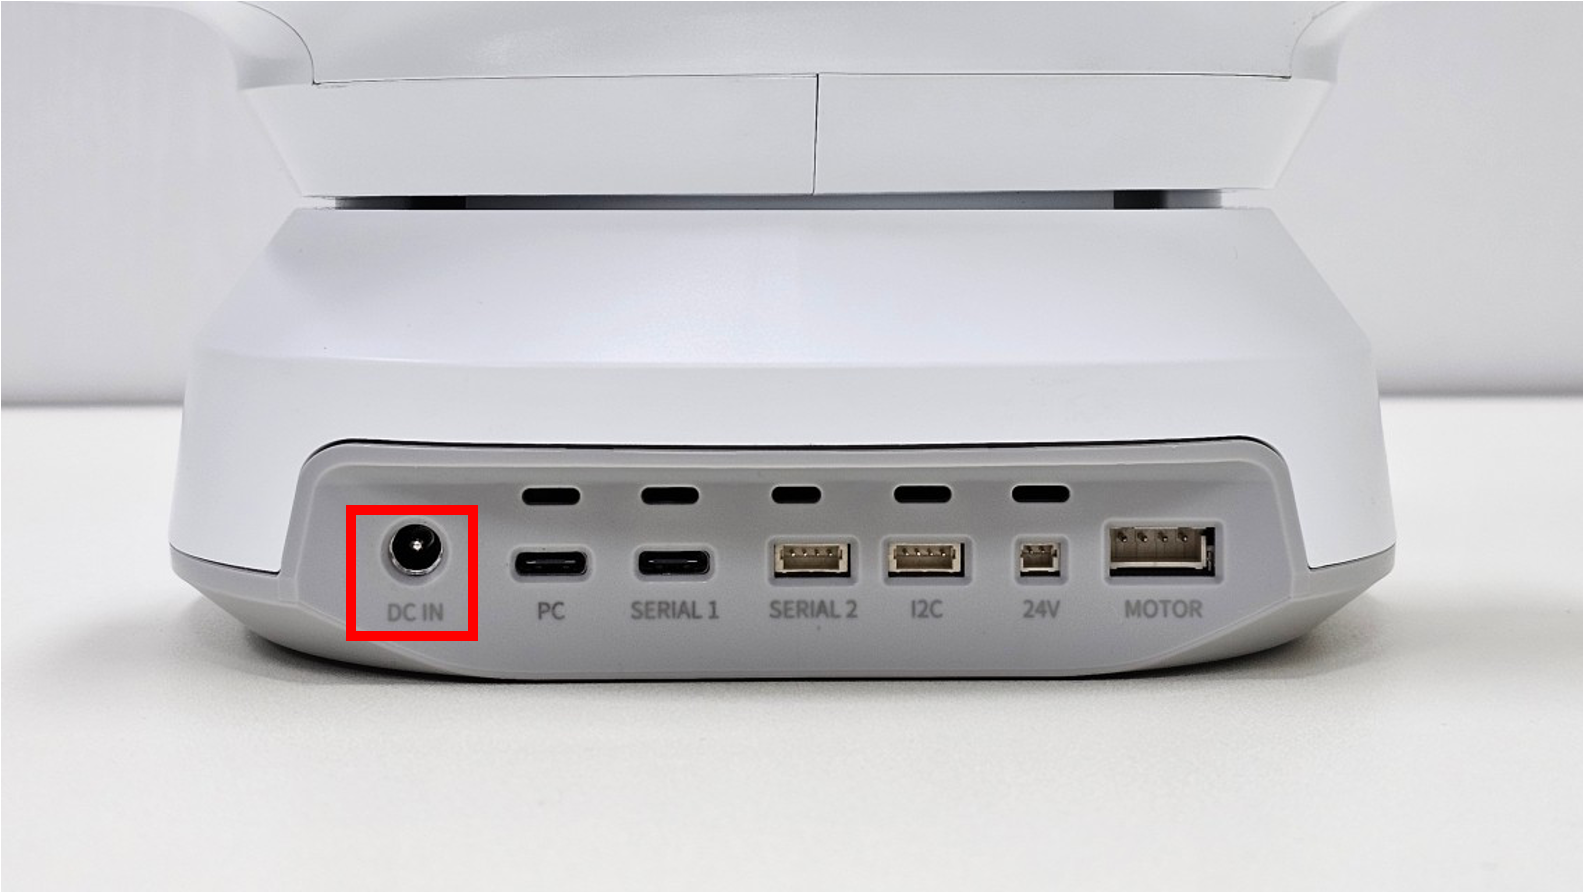
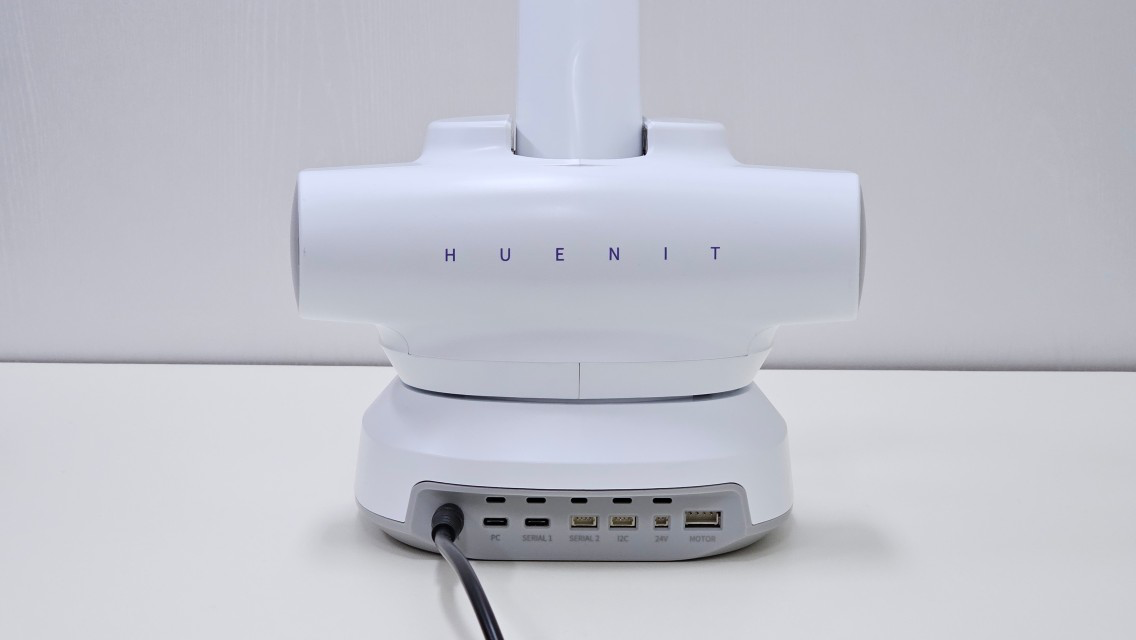
1-2 Connecting Power to the Robot

circle-exclamation

Precautions When Connecting Power to the Robotic Arm

How to Connect the Power Cable

  1. Locate the "DC IN" port on the back of the robotic arm. This is the power input port.

  2. Connect the power cable to the DC IN port and ensure that the robotic arm receives power.

[HUENIT Robotic Arm Rear] - DC IN Port
  1. Once powered on, the HUENIT robotic arm will move to its initial position (x=0, y=180, z=0).

  2. When powered on, the motors will engage, restricting free movement of the robotic arm compared to when the power is off.

[HUENIT Robotic Arm Rear] - Power Cable Connection

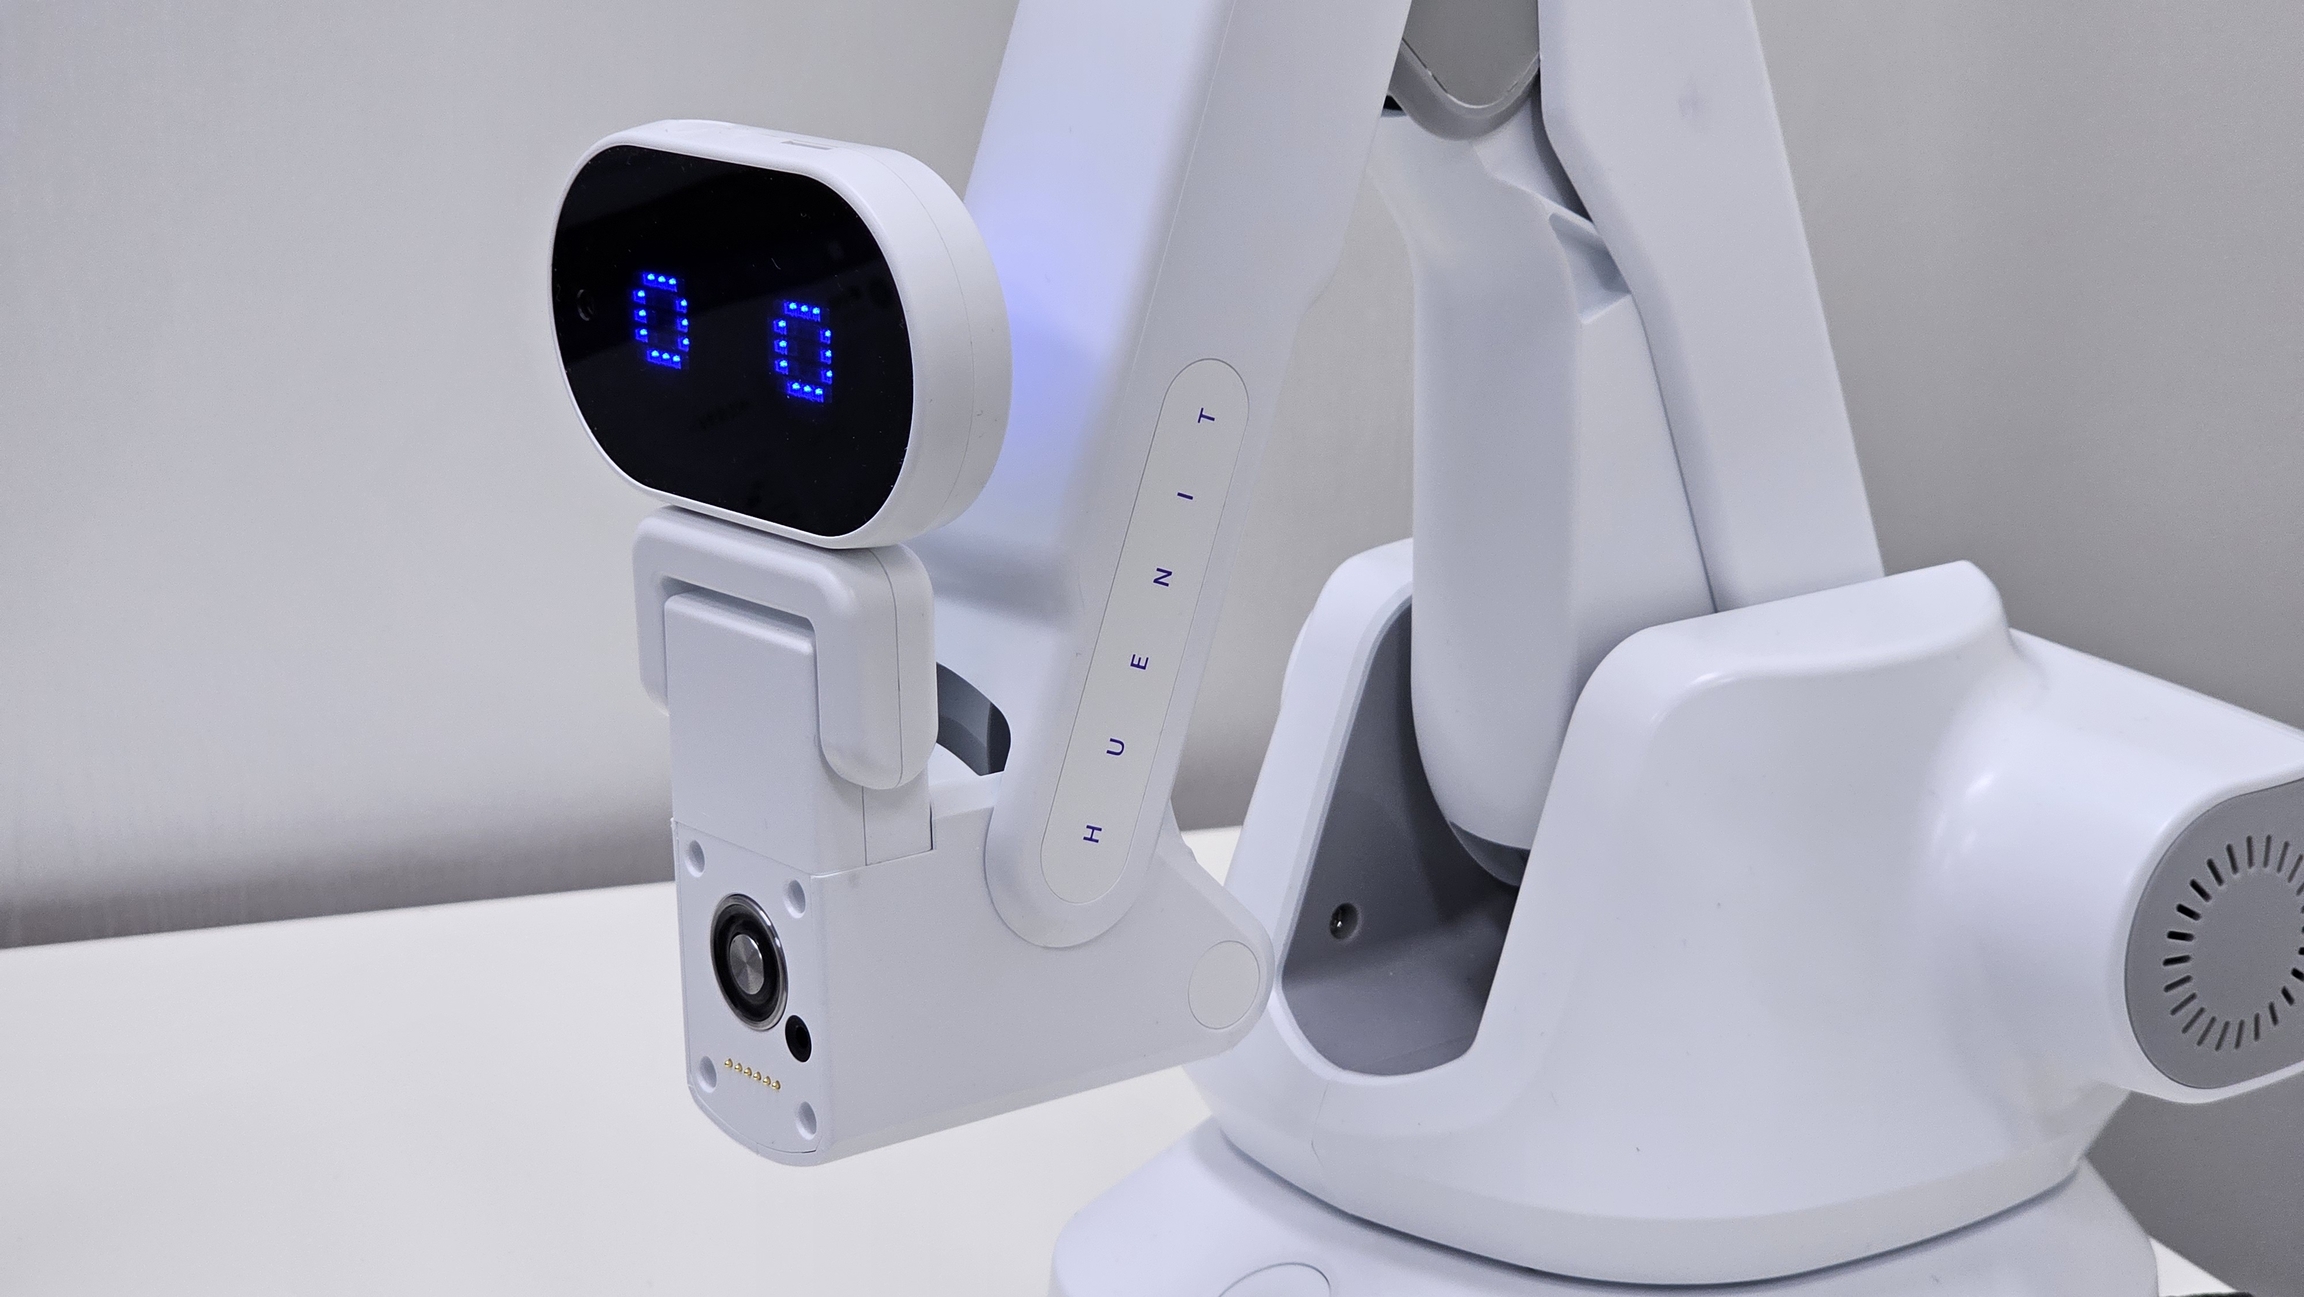
1-3 Connecting the HUENIT Robotic Arm and AI Camera

There are two ways to connect the AI Camera to the robotic arm:

  1. Using the AI Camera Mount

  2. Using the Serial Port on the back of the HUENIT Robotic Arm

To control the robotic arm using HUENIT OS, you must connect the AI Camera using the second method (Serial Port connection).

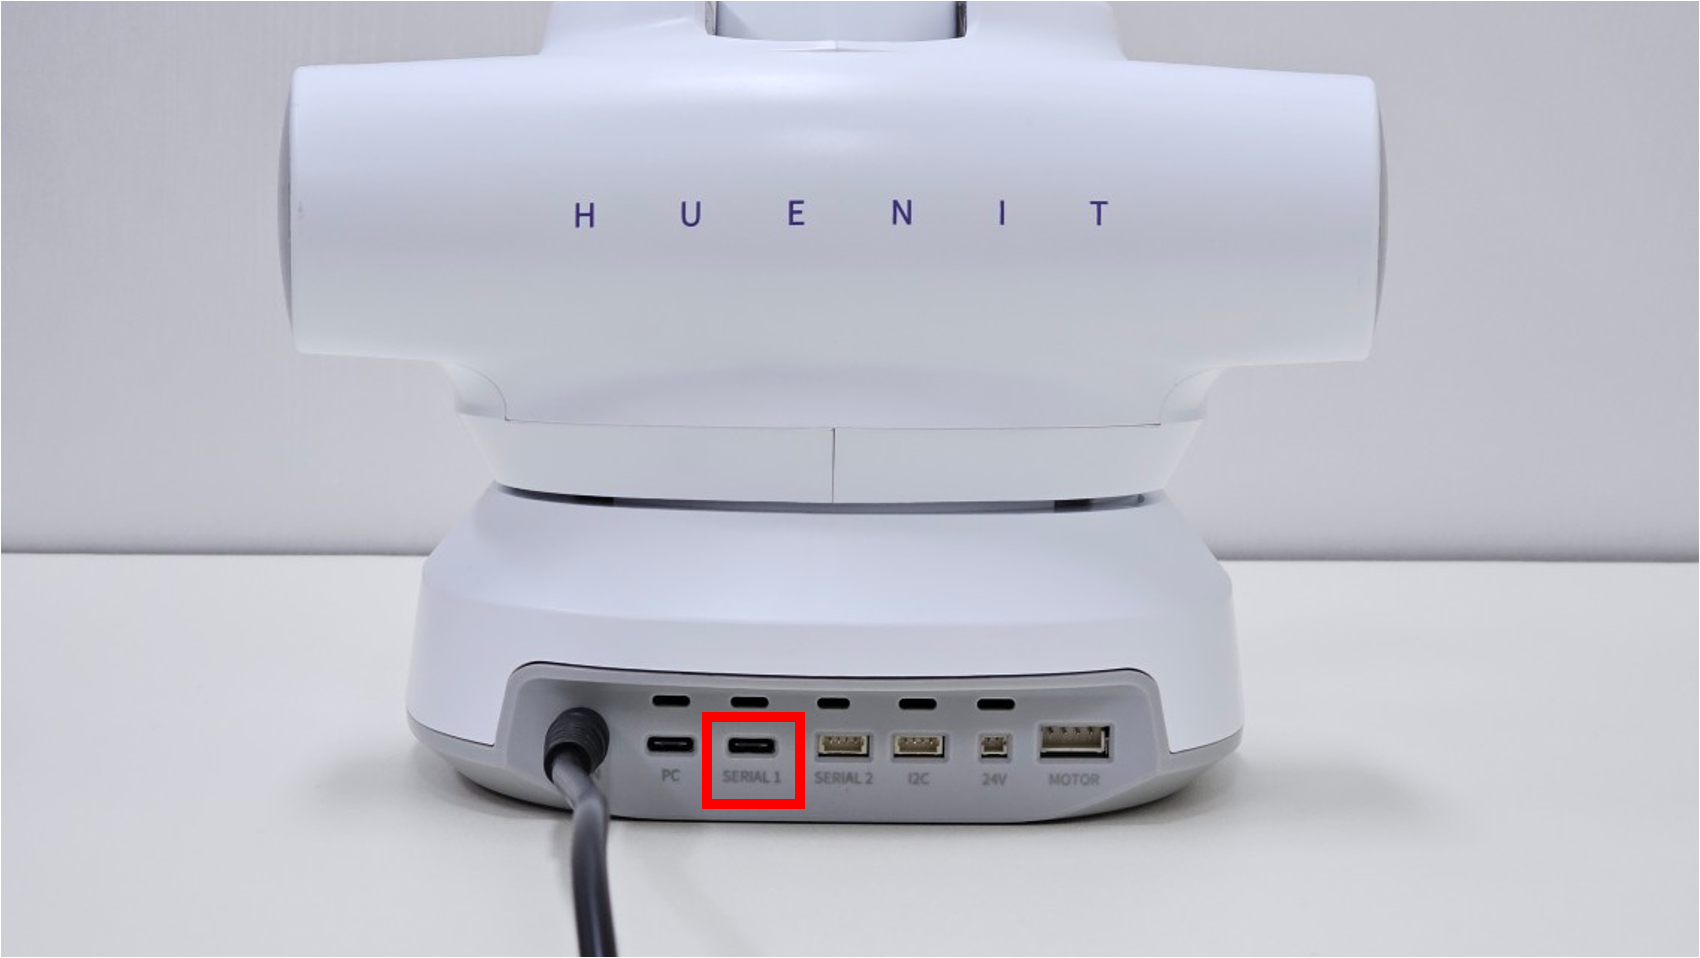
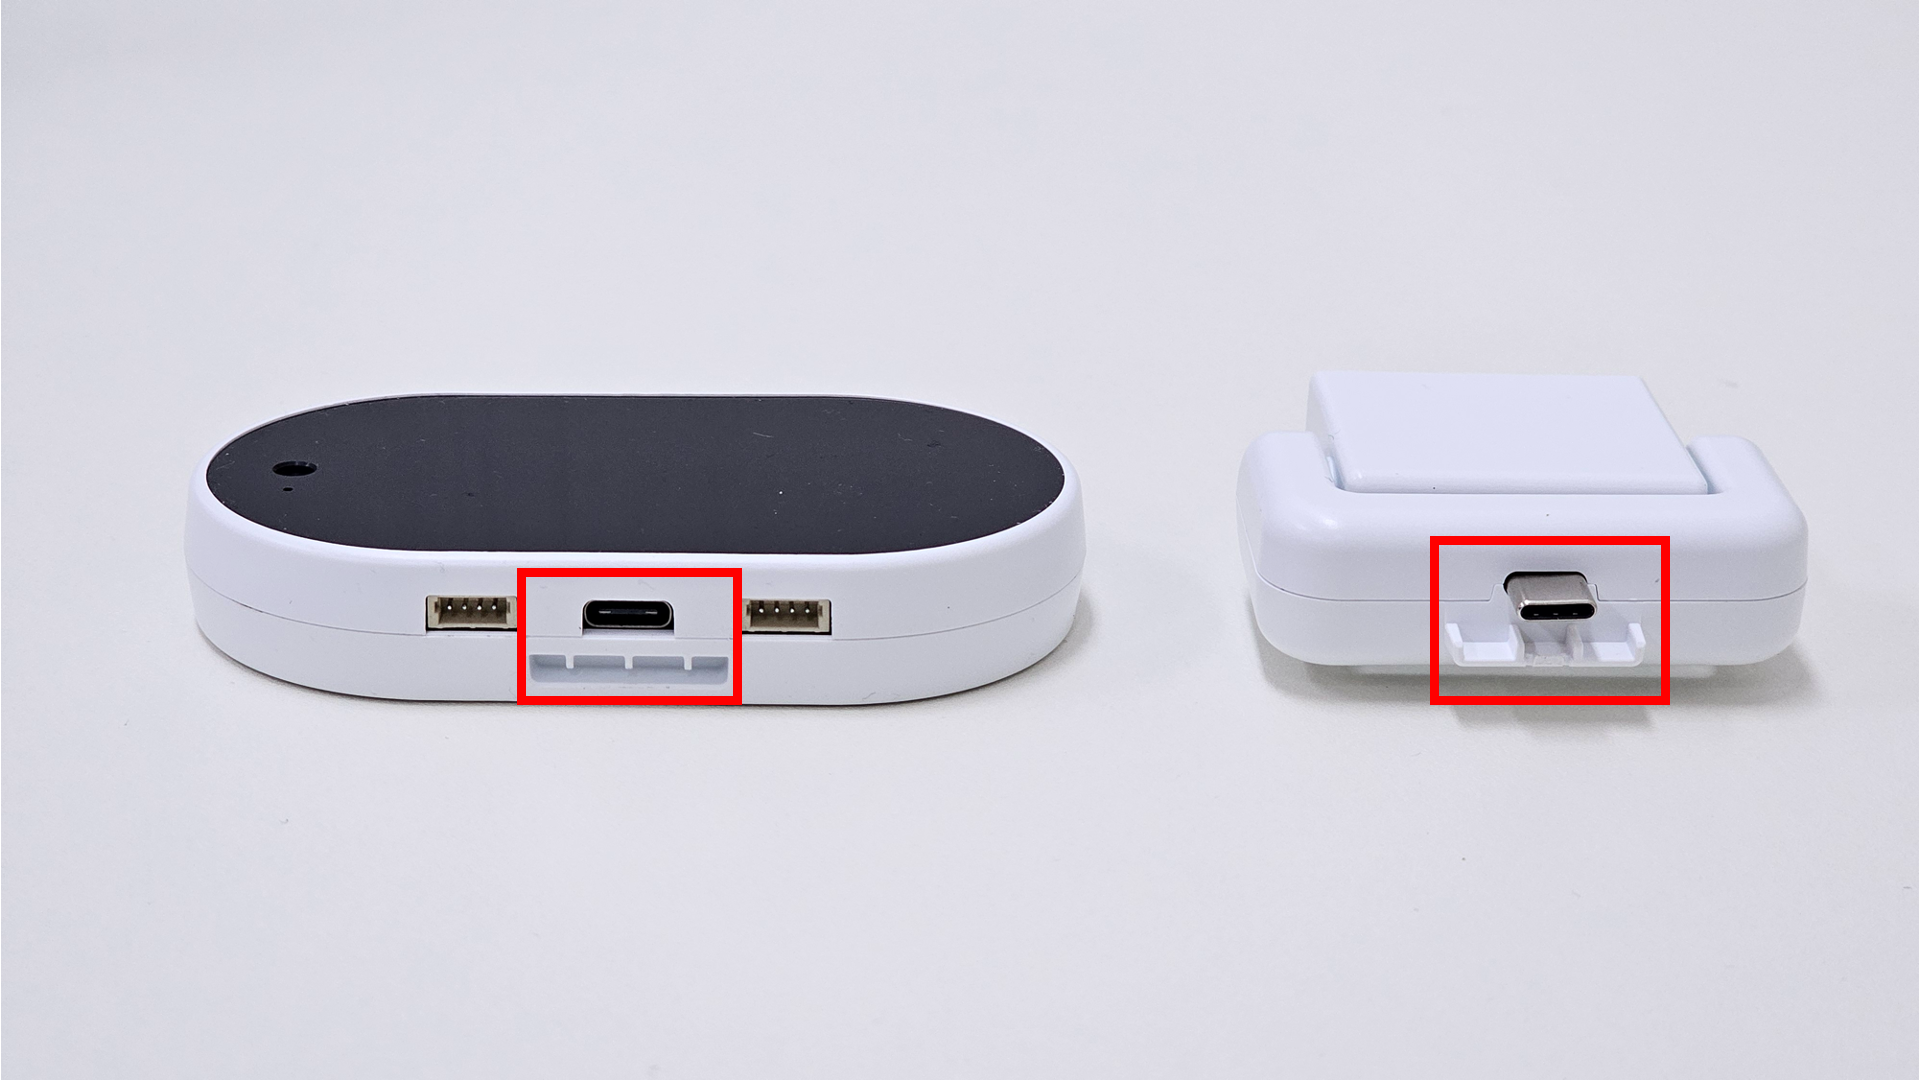
1-3-1 Connecting via the Serial Port on the Back of the HUENIT Robotic Arm

  • There are two USB-C ports on the back of the robotic arm.

  • The AI Camera must be connected to the port labeled "Serial."

  • After connecting the AI Camera, if the HUENIT OS home screen appears, the setup is complete. 🎉

1-3-2 Connecting the AI Camera to the HUENIT Robotic Arm Using the Camera Mount

  • Attach the AI Camera Mount to the USB-C port of the HUENIT AI Camera.

  • Align the AI Camera Mount with the designated slot on the HUENIT robotic arm and connect it using the built-in magnet.

    • ⚠ Caution: Be careful not to pinch your fingers when attaching the mount with the magnet.

  • If the robotic arm is powered on when the AI Camera is connected, an eye-shaped animation will appear on the AI Camera's LED.

  • This indicates that the AI Camera has been successfully connected to the robotic arm.

circle-info

AIf the AI Camera does not light up, check the connection between the metal pins on the AI Camera Mount and the robotic arm to ensure proper contact.

Last updated