# 2.1 Adjust Pen Height (Z-Axis Calibration)
## **Z-Axis Calibration Pop-up**
The **Z-Axis Calibration Pop-up** automatically appears when entering the **\[Drawing]** tab for the first time.\
If the pop-up is closed, it can be reopened by clicking the **\[Z-Axis Calibration]** button in the **top-left corner** of the drawing interface.
1. **First-time Entry** → The pop-up appears automatically.
2. **Clicking the \[Z-Axis Calibration] Button** → Manually reopen the pop-up.
## **Pen Height Adjustment (Z-Axis Calibration)**
Proper **pen height adjustment** is crucial for **high-quality drawing**.\
Precise settings ensure **clean and accurate** drawing results.\
HUENIT provides **three Z-Axis calibration options**:
> Z-Axis Calibration Modes
1️⃣ **Manual Calibration**
* Users manually adjust the **pen height** to the desired position.
2️⃣ **Use Current Position**
* Sets the Z value based on the **robotic arm's current pen position**.
3️⃣ **Use Default Position**
* Uses a system-defined **default** Z-axis value.
> ### **Work Area Visualization**
* As the **Z-axis height is set**, the **robotic arm's available drawing area** is displayed **in real time** on the screen.
* This feature helps users check the workspace and **make necessary adjustments** before drawing.
## **How to Perform Z-Axis Calibration for Each Mode**
> Preparation
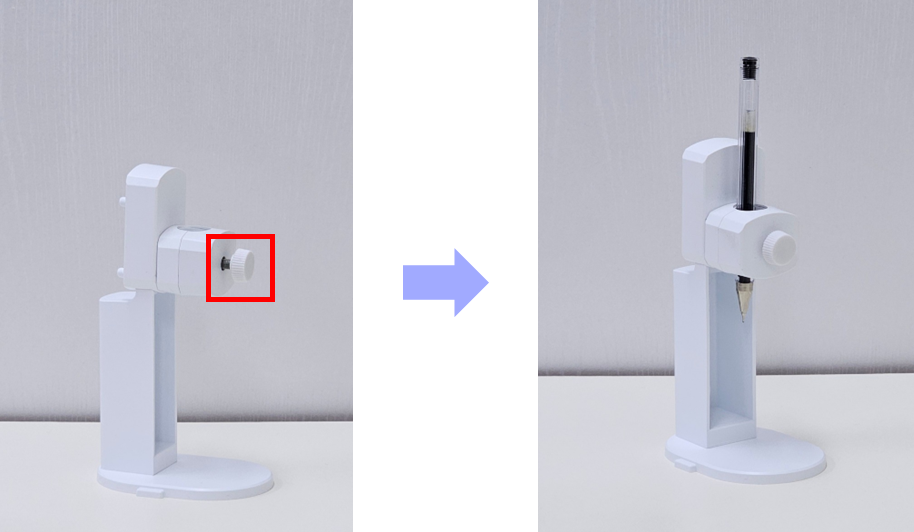
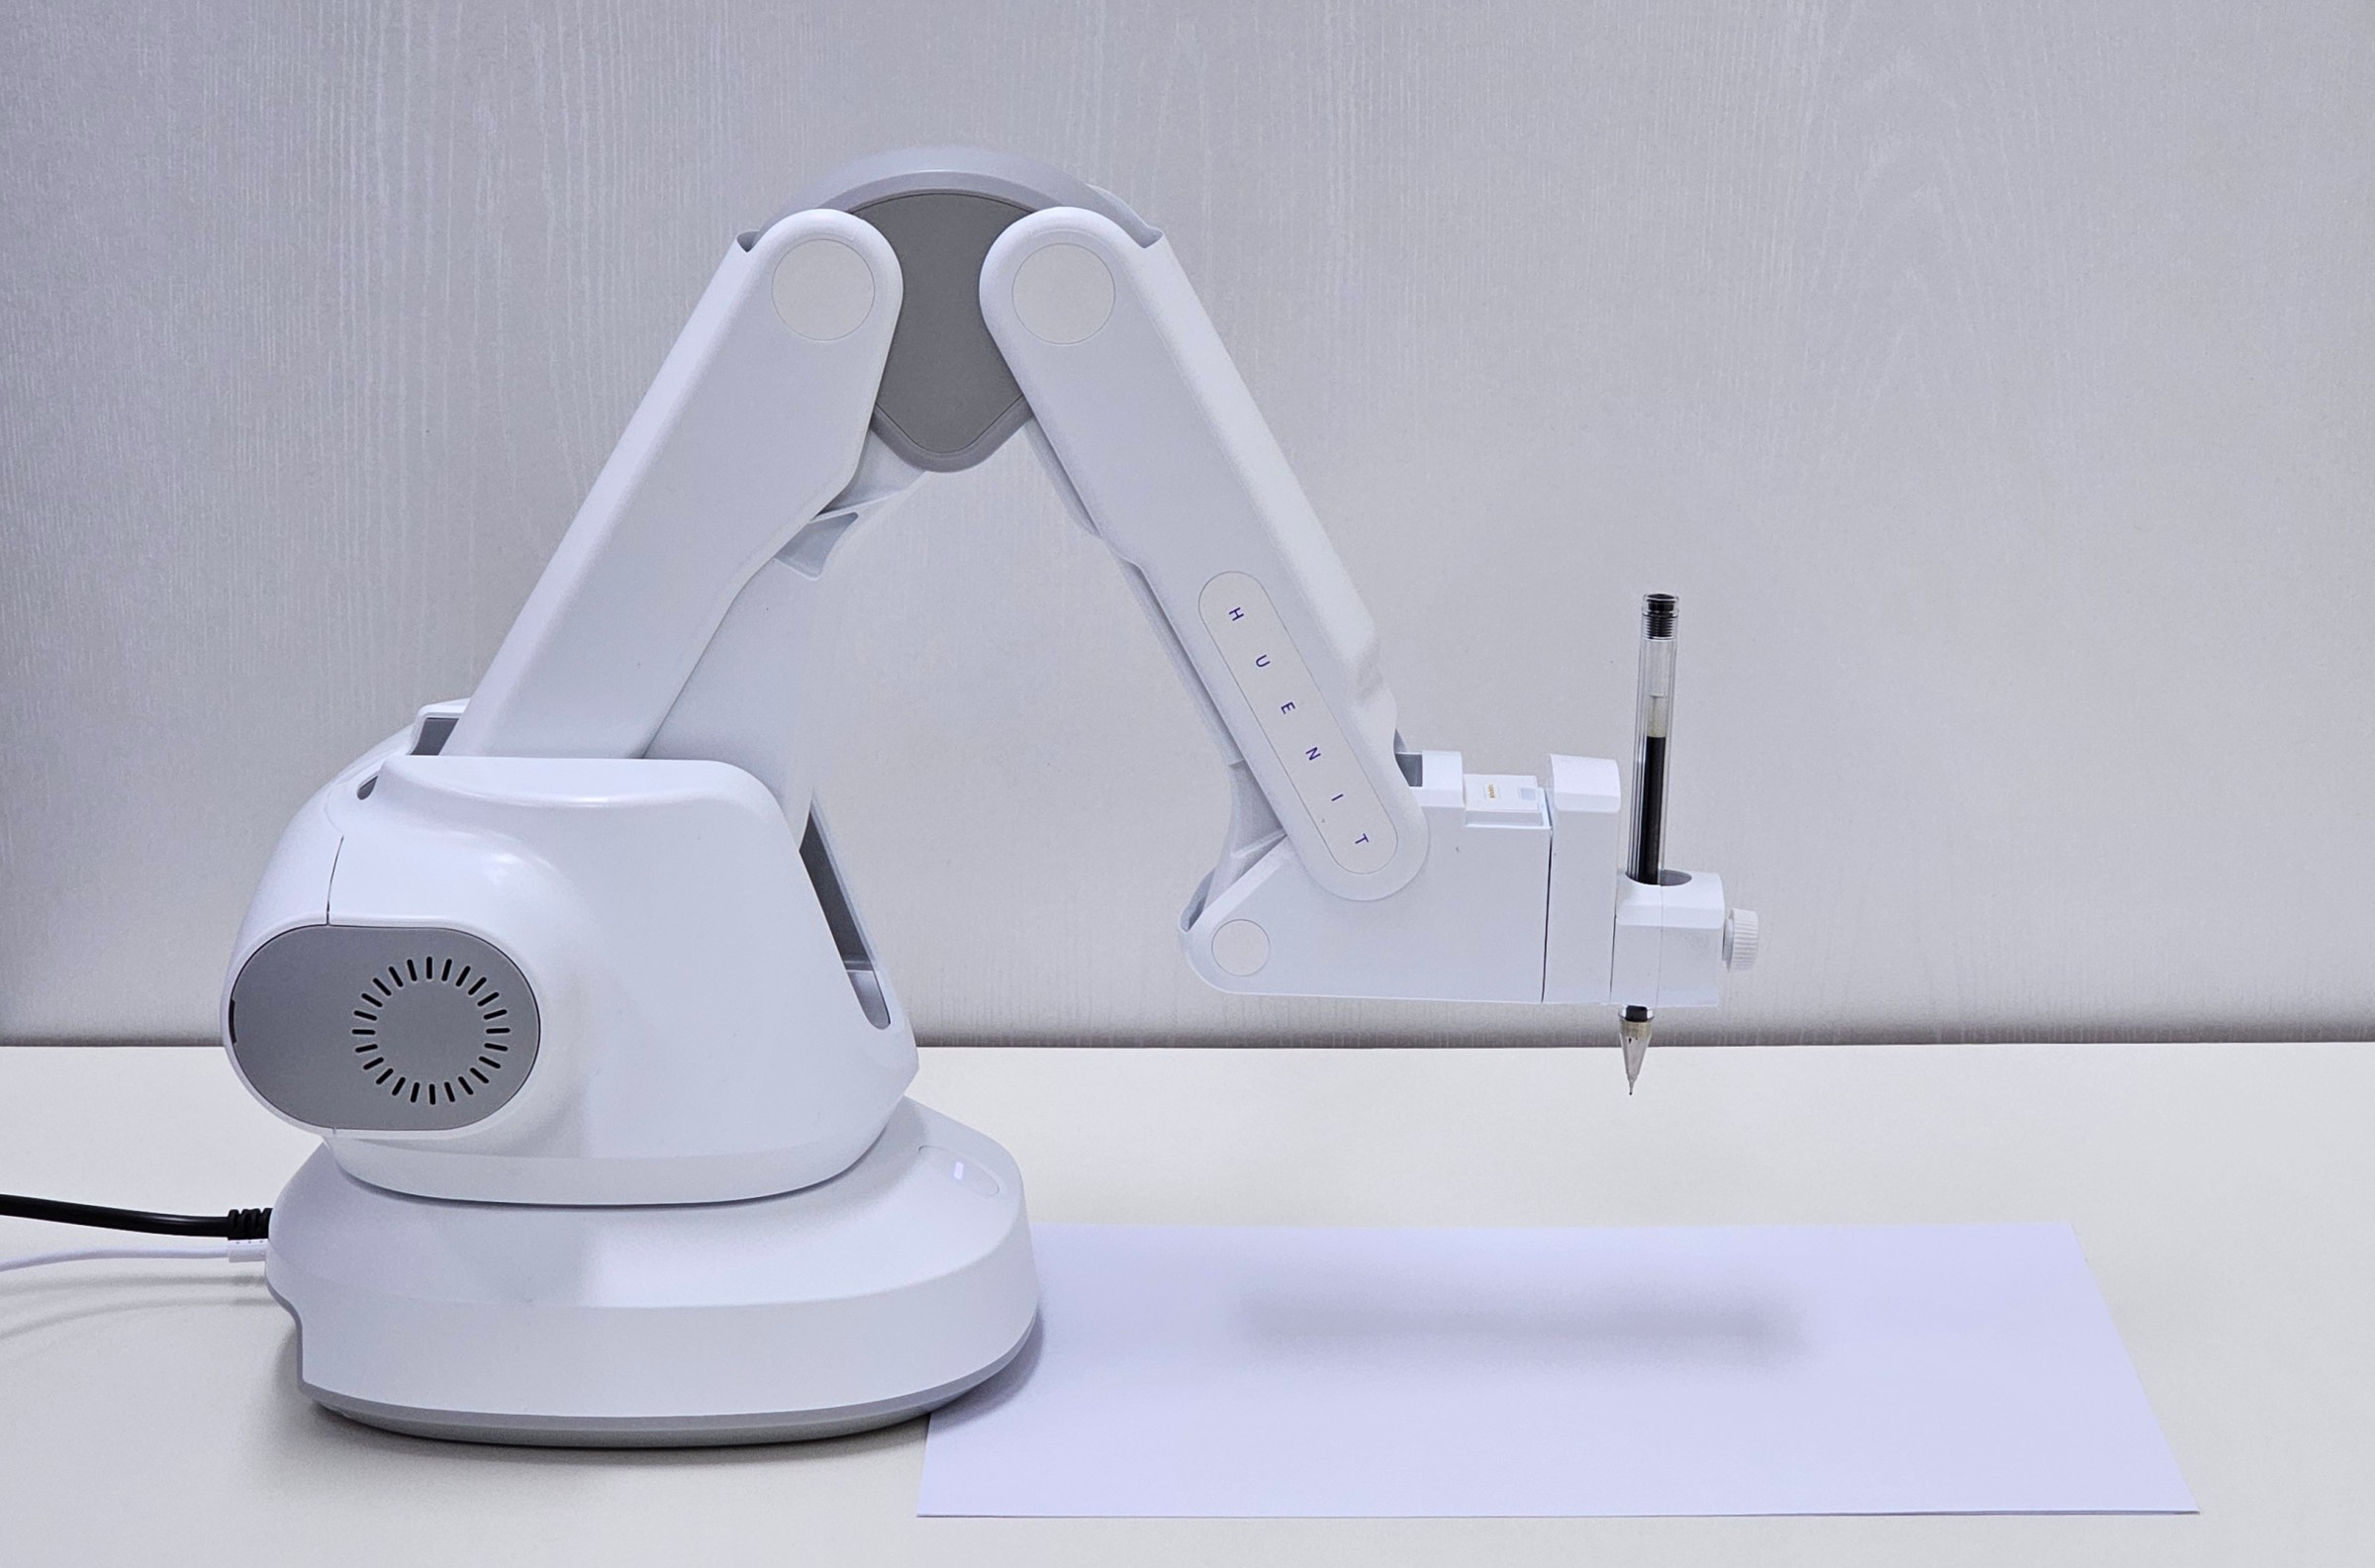
✅ **Install the Pen Holder Module**
* Insert the **pen** into the **pen holder module** and **secure it tightly** with the provided screws.
{% hint style="warning" %}
If the pen is not properly fastened, it may shake or move upward during drawing, affecting accuracy.
{% endhint %}
✅ **Place Paper on the Drawing Surface**
* Place paper where the pen tip will touch.
{% hint style="warning" %}
**Use paper of the same thickness** as the actual drawing paper for precise Z-Axis calibration.\
Keeping a **consistent work environment** is essential for accuracy.
{% endhint %}
The Pen Holder Module Attached to the Robotic Arm
### **1. Manual Calibration**
{% hint style="warning" %}
Manual calibration is only available when the HUENIT robotic arm is connected.
{% endhint %}
> STEP 1: Connect the Robotic Arm
Click **\[Manual] Button** to initiate automatic connection to the **HUENIT robotic arm**.
If the connection **fails**, check the **PC and robotic arm connection** and click **\[🔗(Auto-Connect)]** to retry.
Once connected successfully, proceed with manual calibration.
> STEP 2: Adjust the Z-Axis
Use the **\[Z+], \[Z0], and \[Z-] buttons** to slowly lower the **pen tip** until it touches the paper.
{% hint style="warning" %}
The pen should not just lightly touch the paper; it needs to be lowered enough for the pen to lift slightly due to the spring in the pen holder.
{% endhint %}
> STEP 3: Apply & Verify the Work Area
* Click **\[Apply]** to finalize the Z-Axis calibration.
* The **work area is updated** according to the set Z-axis value.
### 2**. Use Current Position**
{% hint style="warning" %}
This method is only available when the HUENIT robotic arm is connected.
{% endhint %}
> STEP 1: Connect the Robotic Arm
Go to the **\[Control]** tab and click **\[Auto-Connect]** to connect the robotic arm to the PC.
> STEP 2: Move the Robotic Arm to the Desired Position
* **Turn off the motor** before adjusting the position.
* **Manually move** the robotic arm so the **pen tip lightly touches the paper**.
* **Turn the motor back on** after positioning the pen.
> Motor OFF → Adjust Pen Position → Motor ON
> STEP 3: Select & Apply "Use Current Position"
* In the **Z-Axis Calibration Pop-up**, click **\[Use Current Position]**.
* The robotic arm’s **current location is set** as the Z-Axis value.
* Click **\[Apply]** to finalize the calibration and update the work area.
> ### \*Important Note
* If the **\[Auto-Connect 🔗]** button is clicked, the robotic arm will **automatically move to X:0, Y:200, Z:20**.
* **Z-Axis calibration cannot be performed at this position**, so users must manually move the robotic arm before setting the Z-Axis.
### **3. Use Default Position**
* This mode is useful when users **want to maintain** the Z value from a **previous drawing session**.
* **Does not require** the robotic arm to be connected.
> #### **How to Adjust the Z Value in Default Mode:**
1️⃣ **Direct Input**
* Manually enter a **specific Z value**.
2️⃣ **Adjust Using the Slider**
* Use the **slider** to modify the Z value.